
- Colleague (Datatel)
- MyAccess and Parent Portal
- Registration, Checklist, or Signing Documents
- Touchnet
- Reports and ETL
How to Image a Computer Using Acronis
To image a computer, connect one of the IT drives and an Acronis USB to the computer before turning it on.
Step 1: Boot into BIOS and change the default settings to the following in the BIOS Setup. Turn on advanced settings if needed.
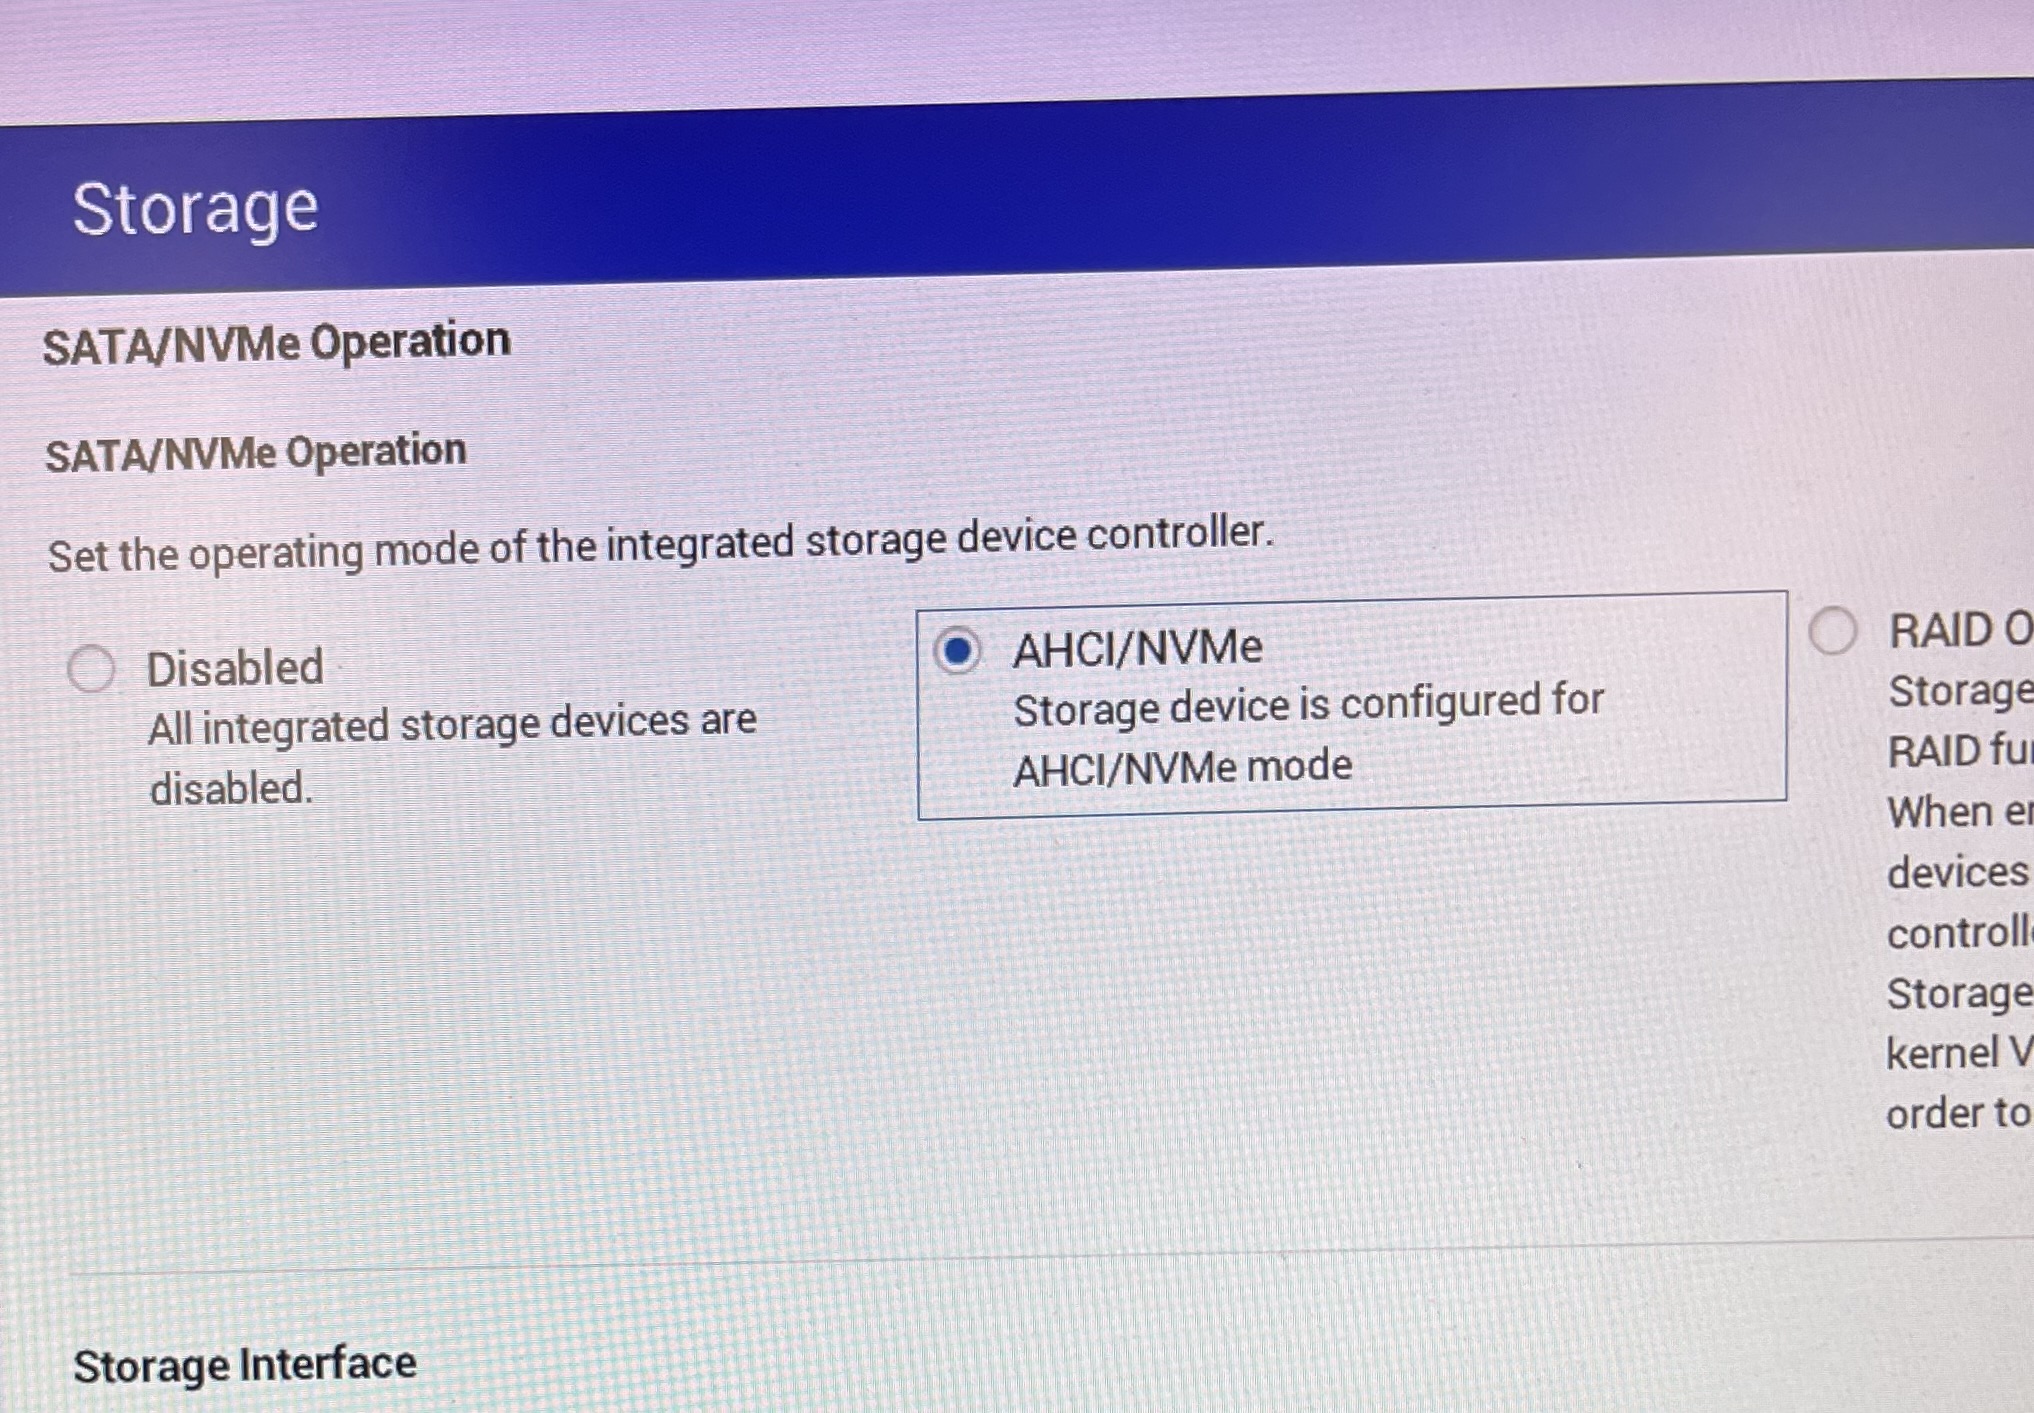
- AHCI/NVMe from the Storage section
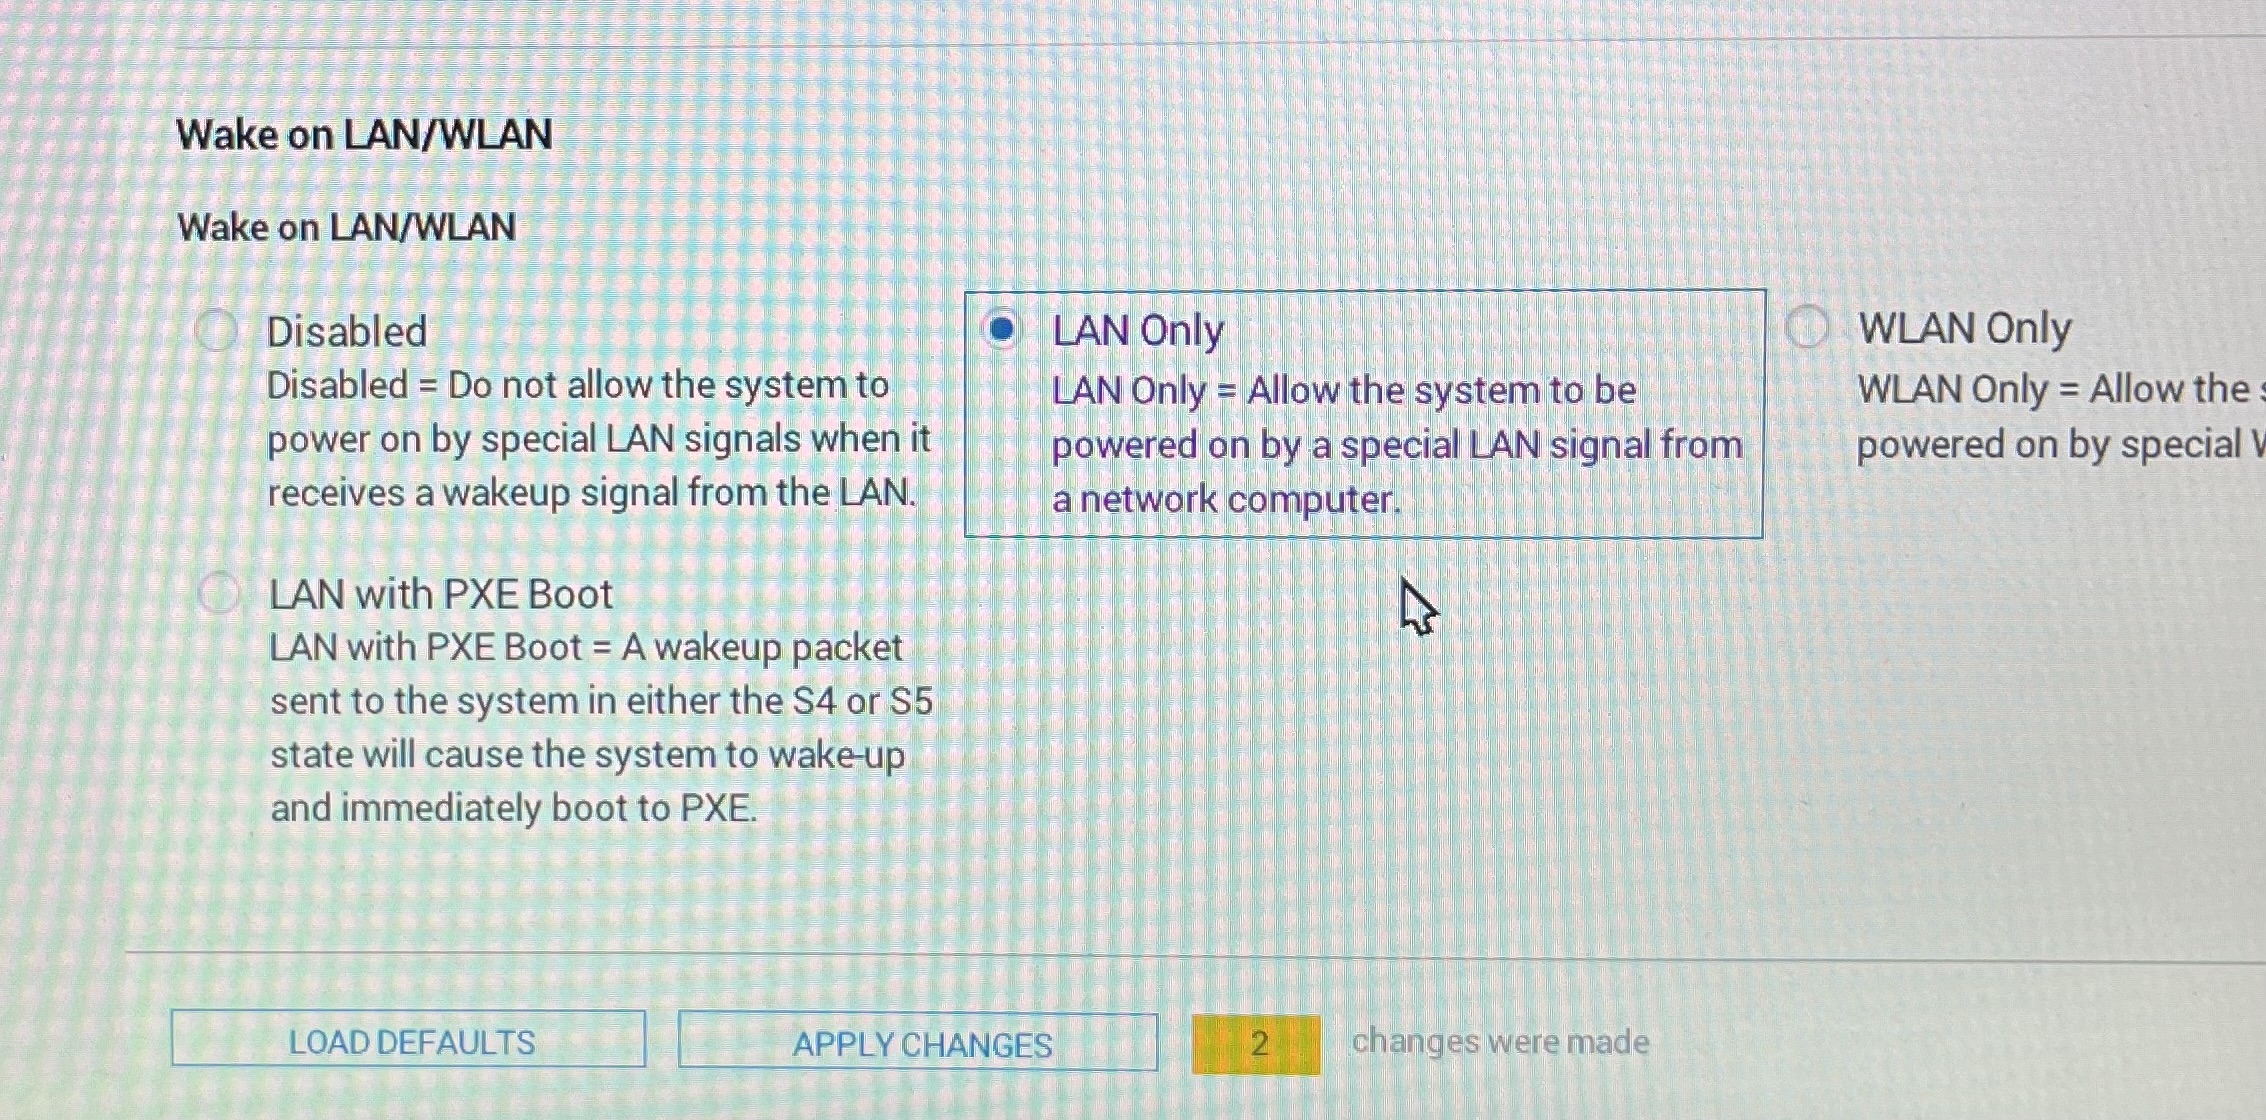
- LAN Only from the System Management section
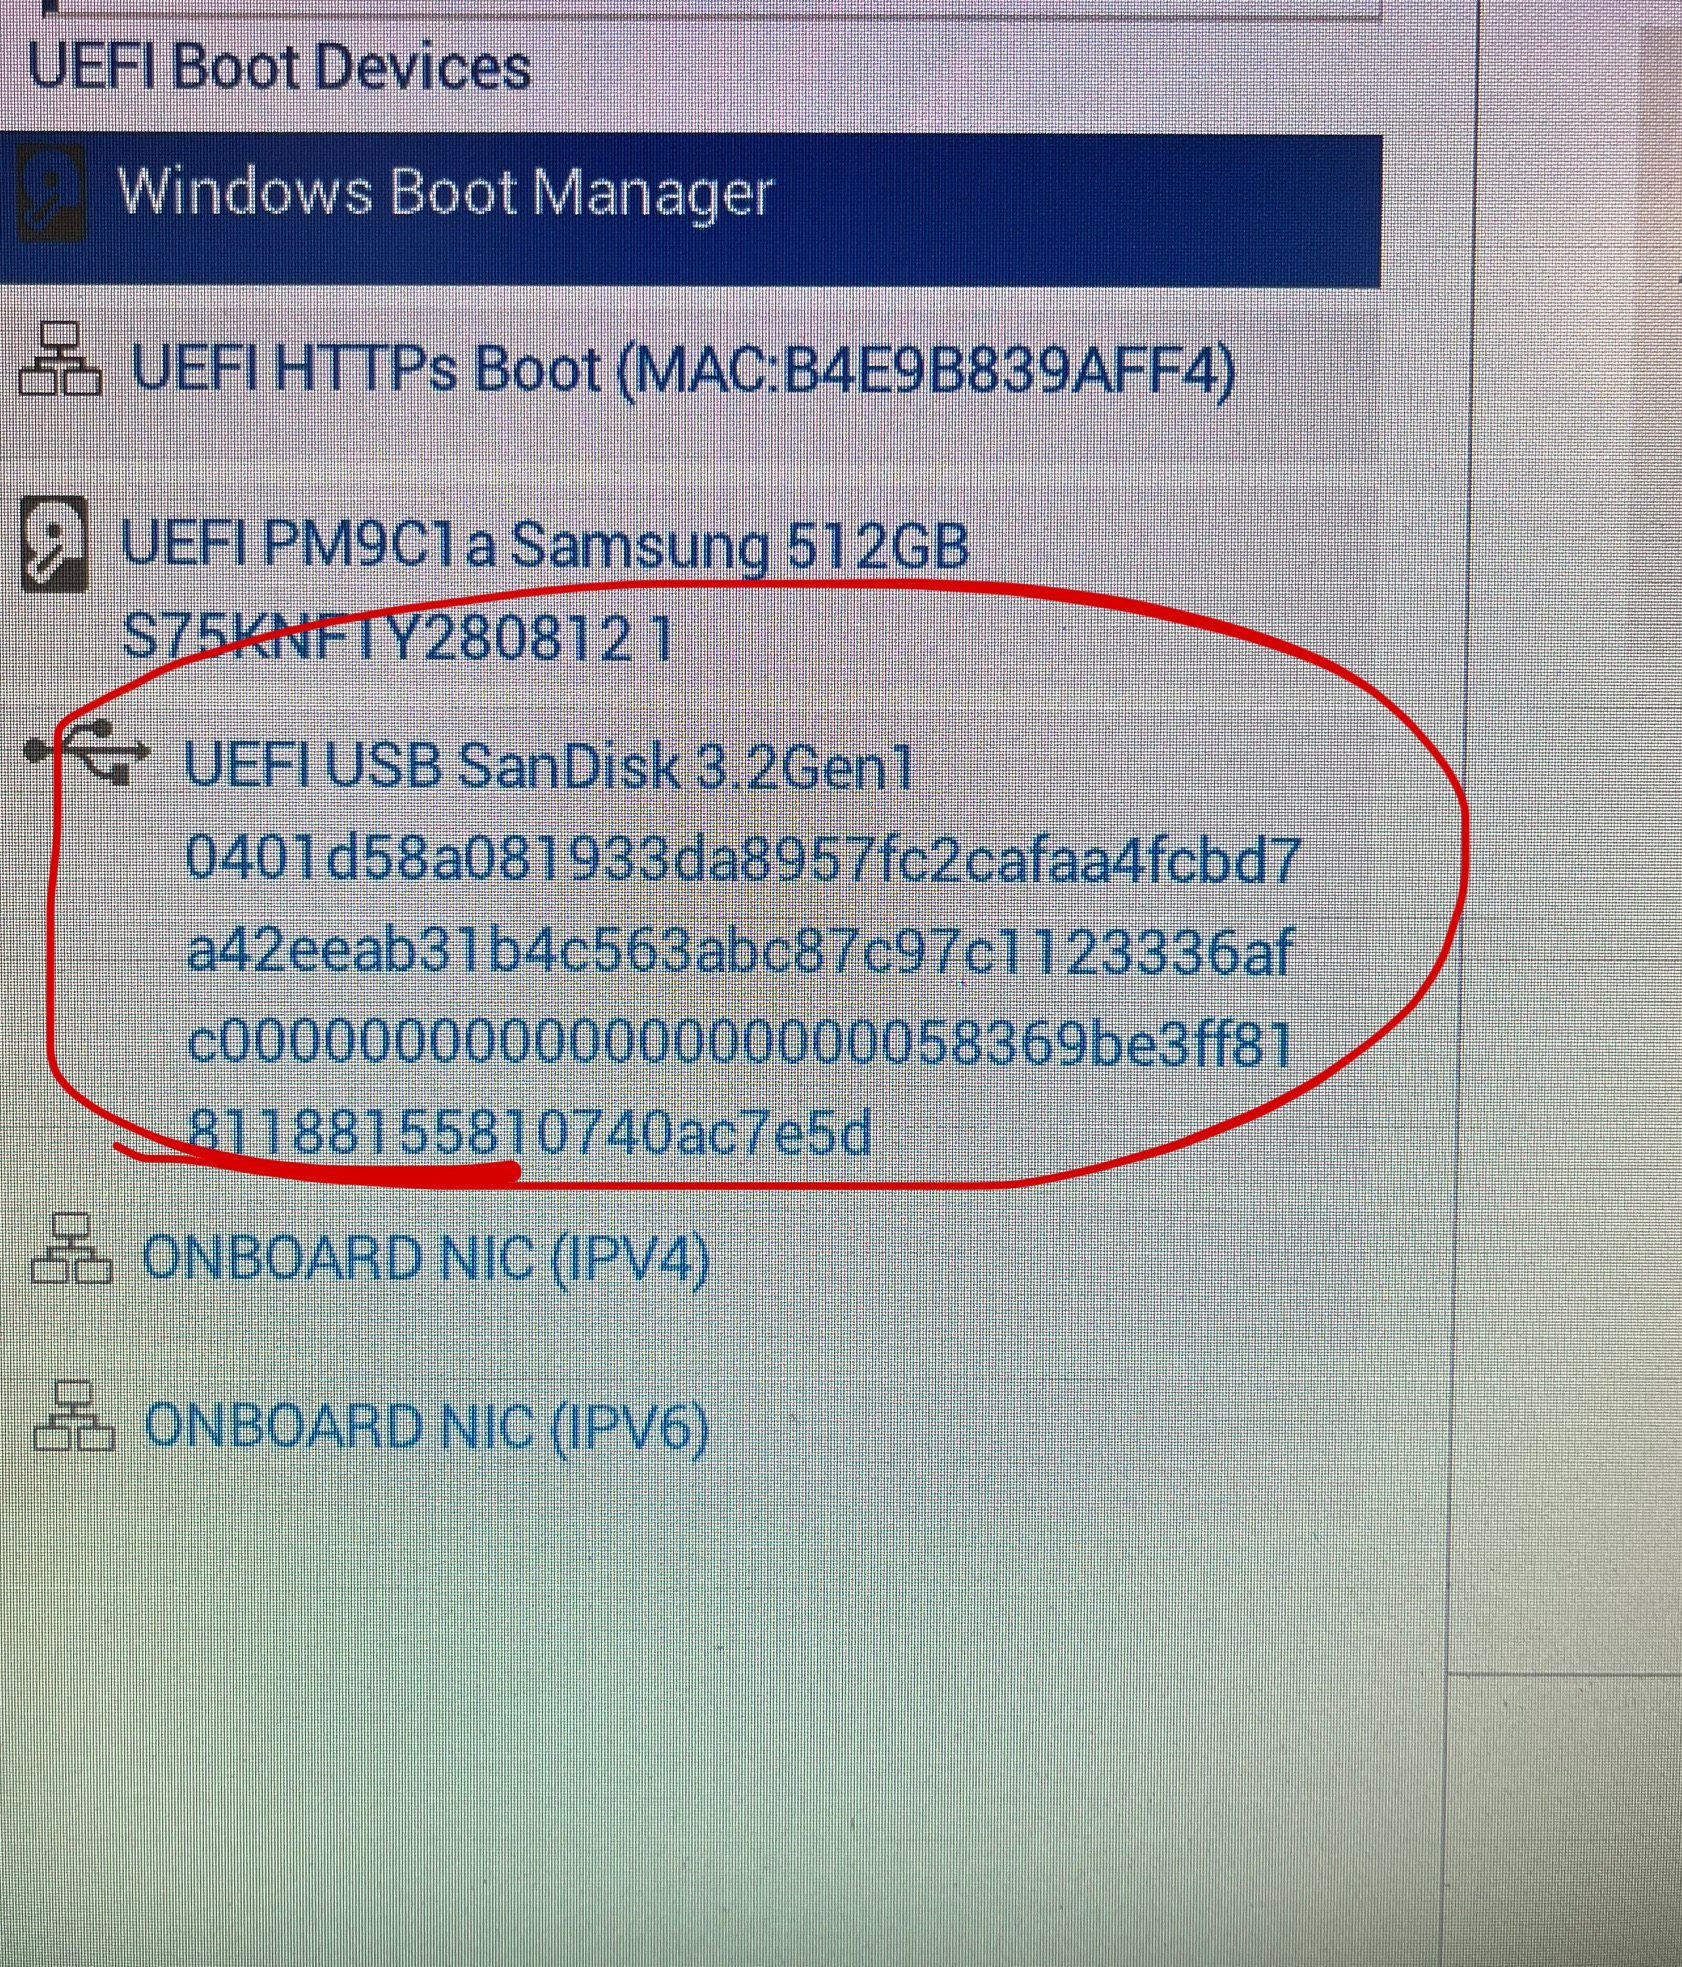
Step 2: Restart after applying changes and boot back into BIOS.
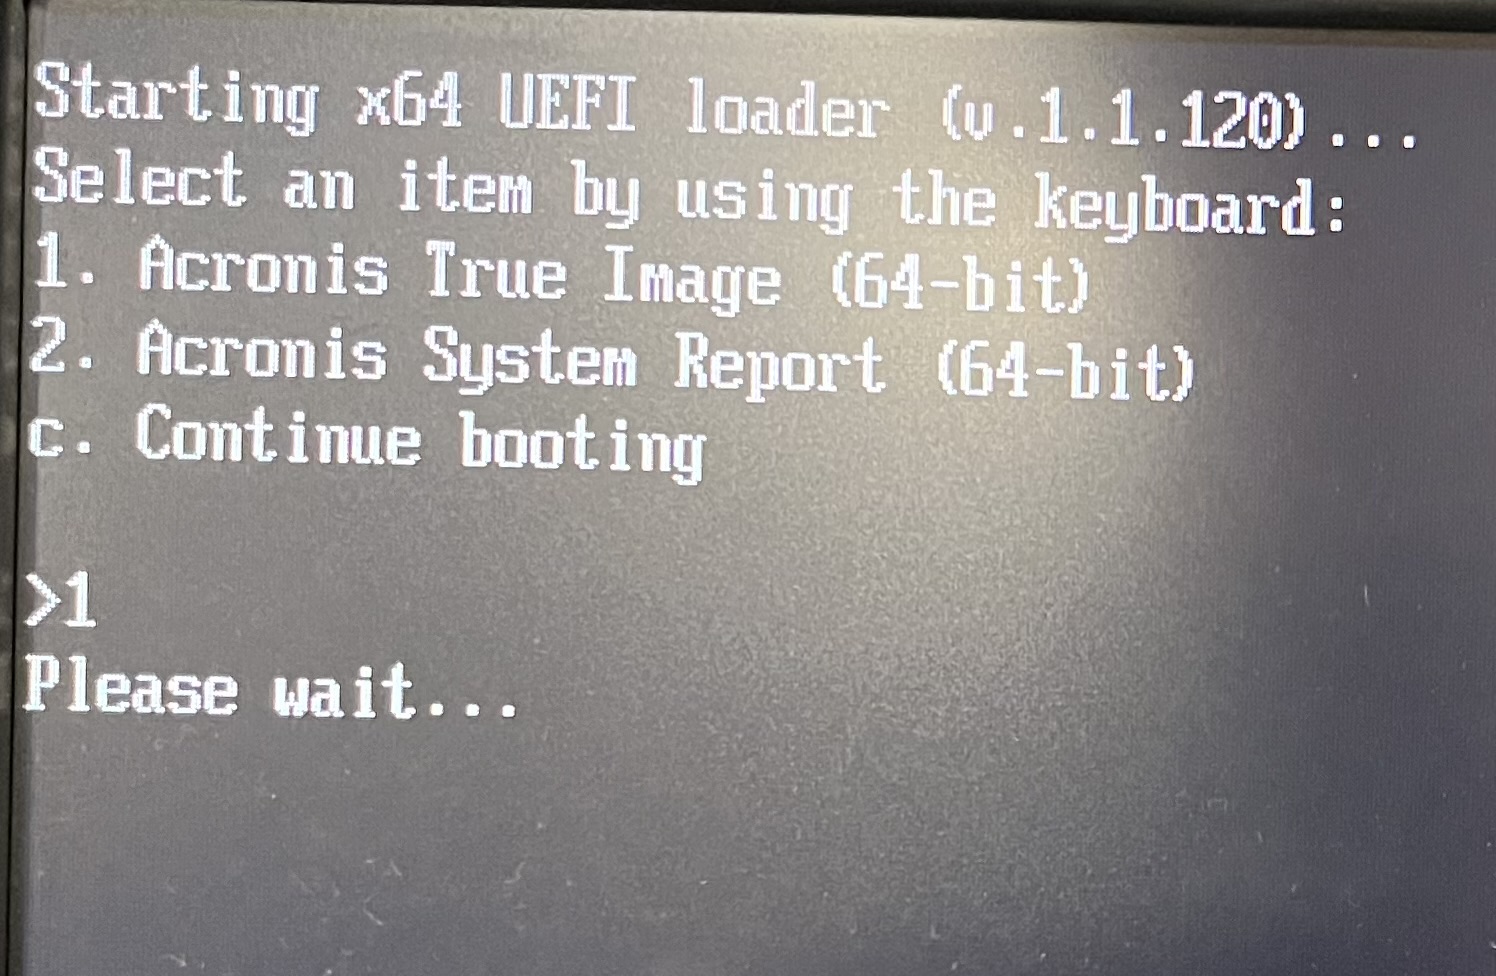
Boot into Acronis and press 1
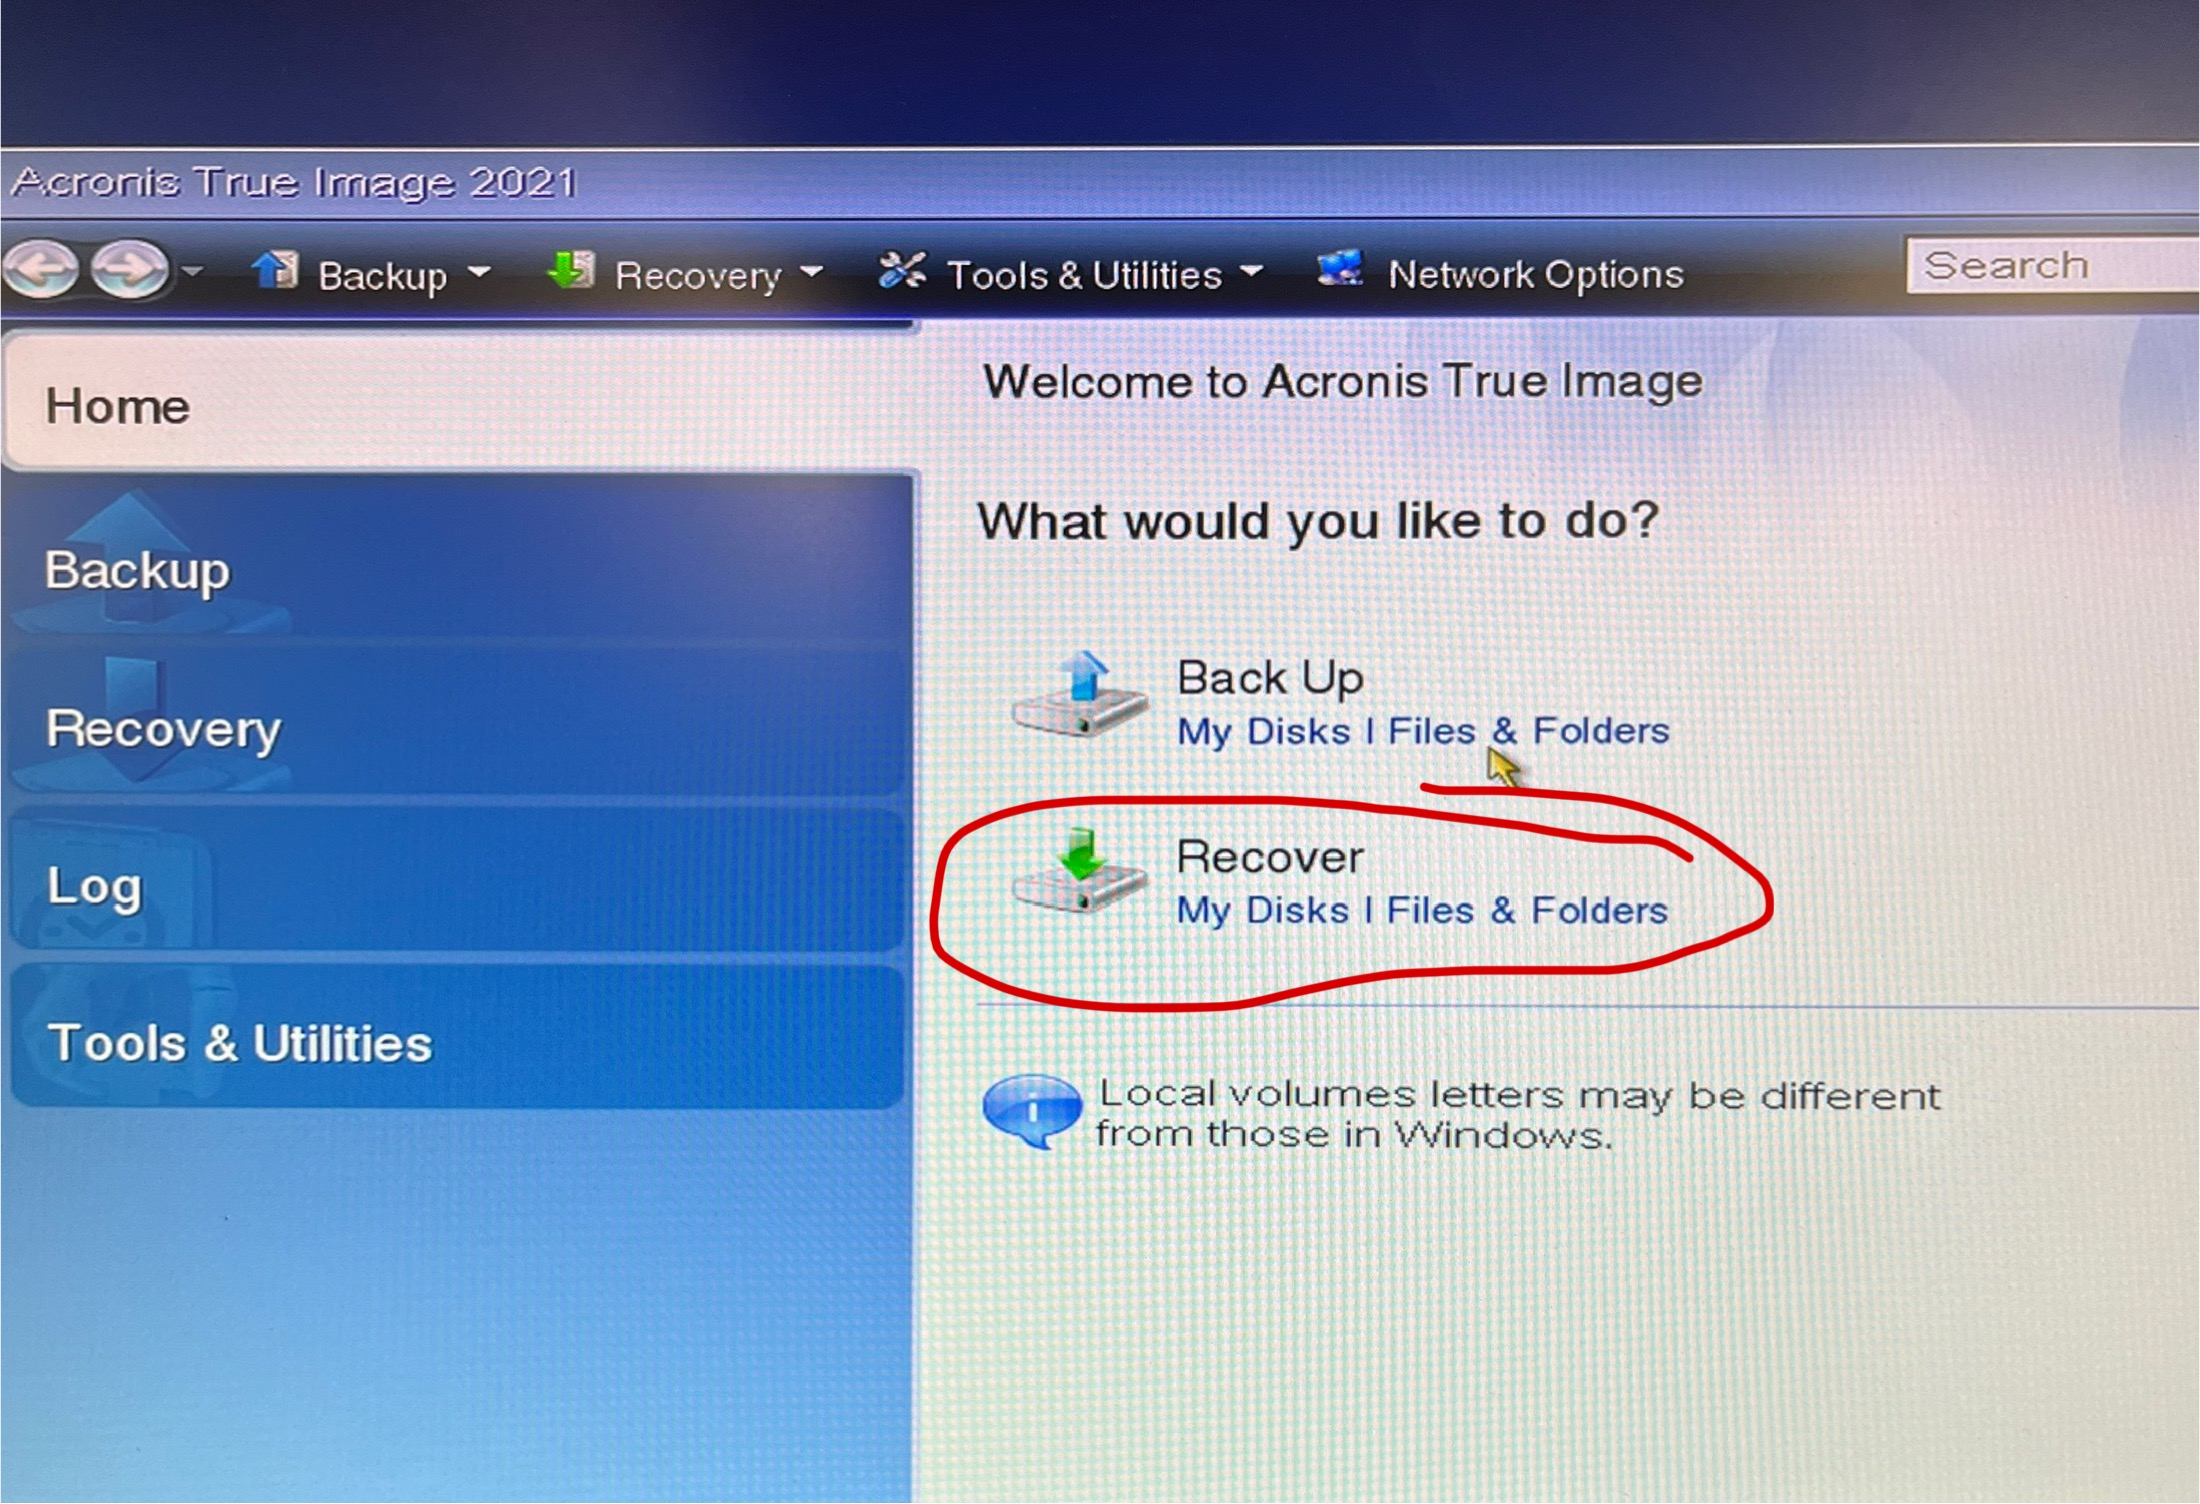
Step 3: select Recover
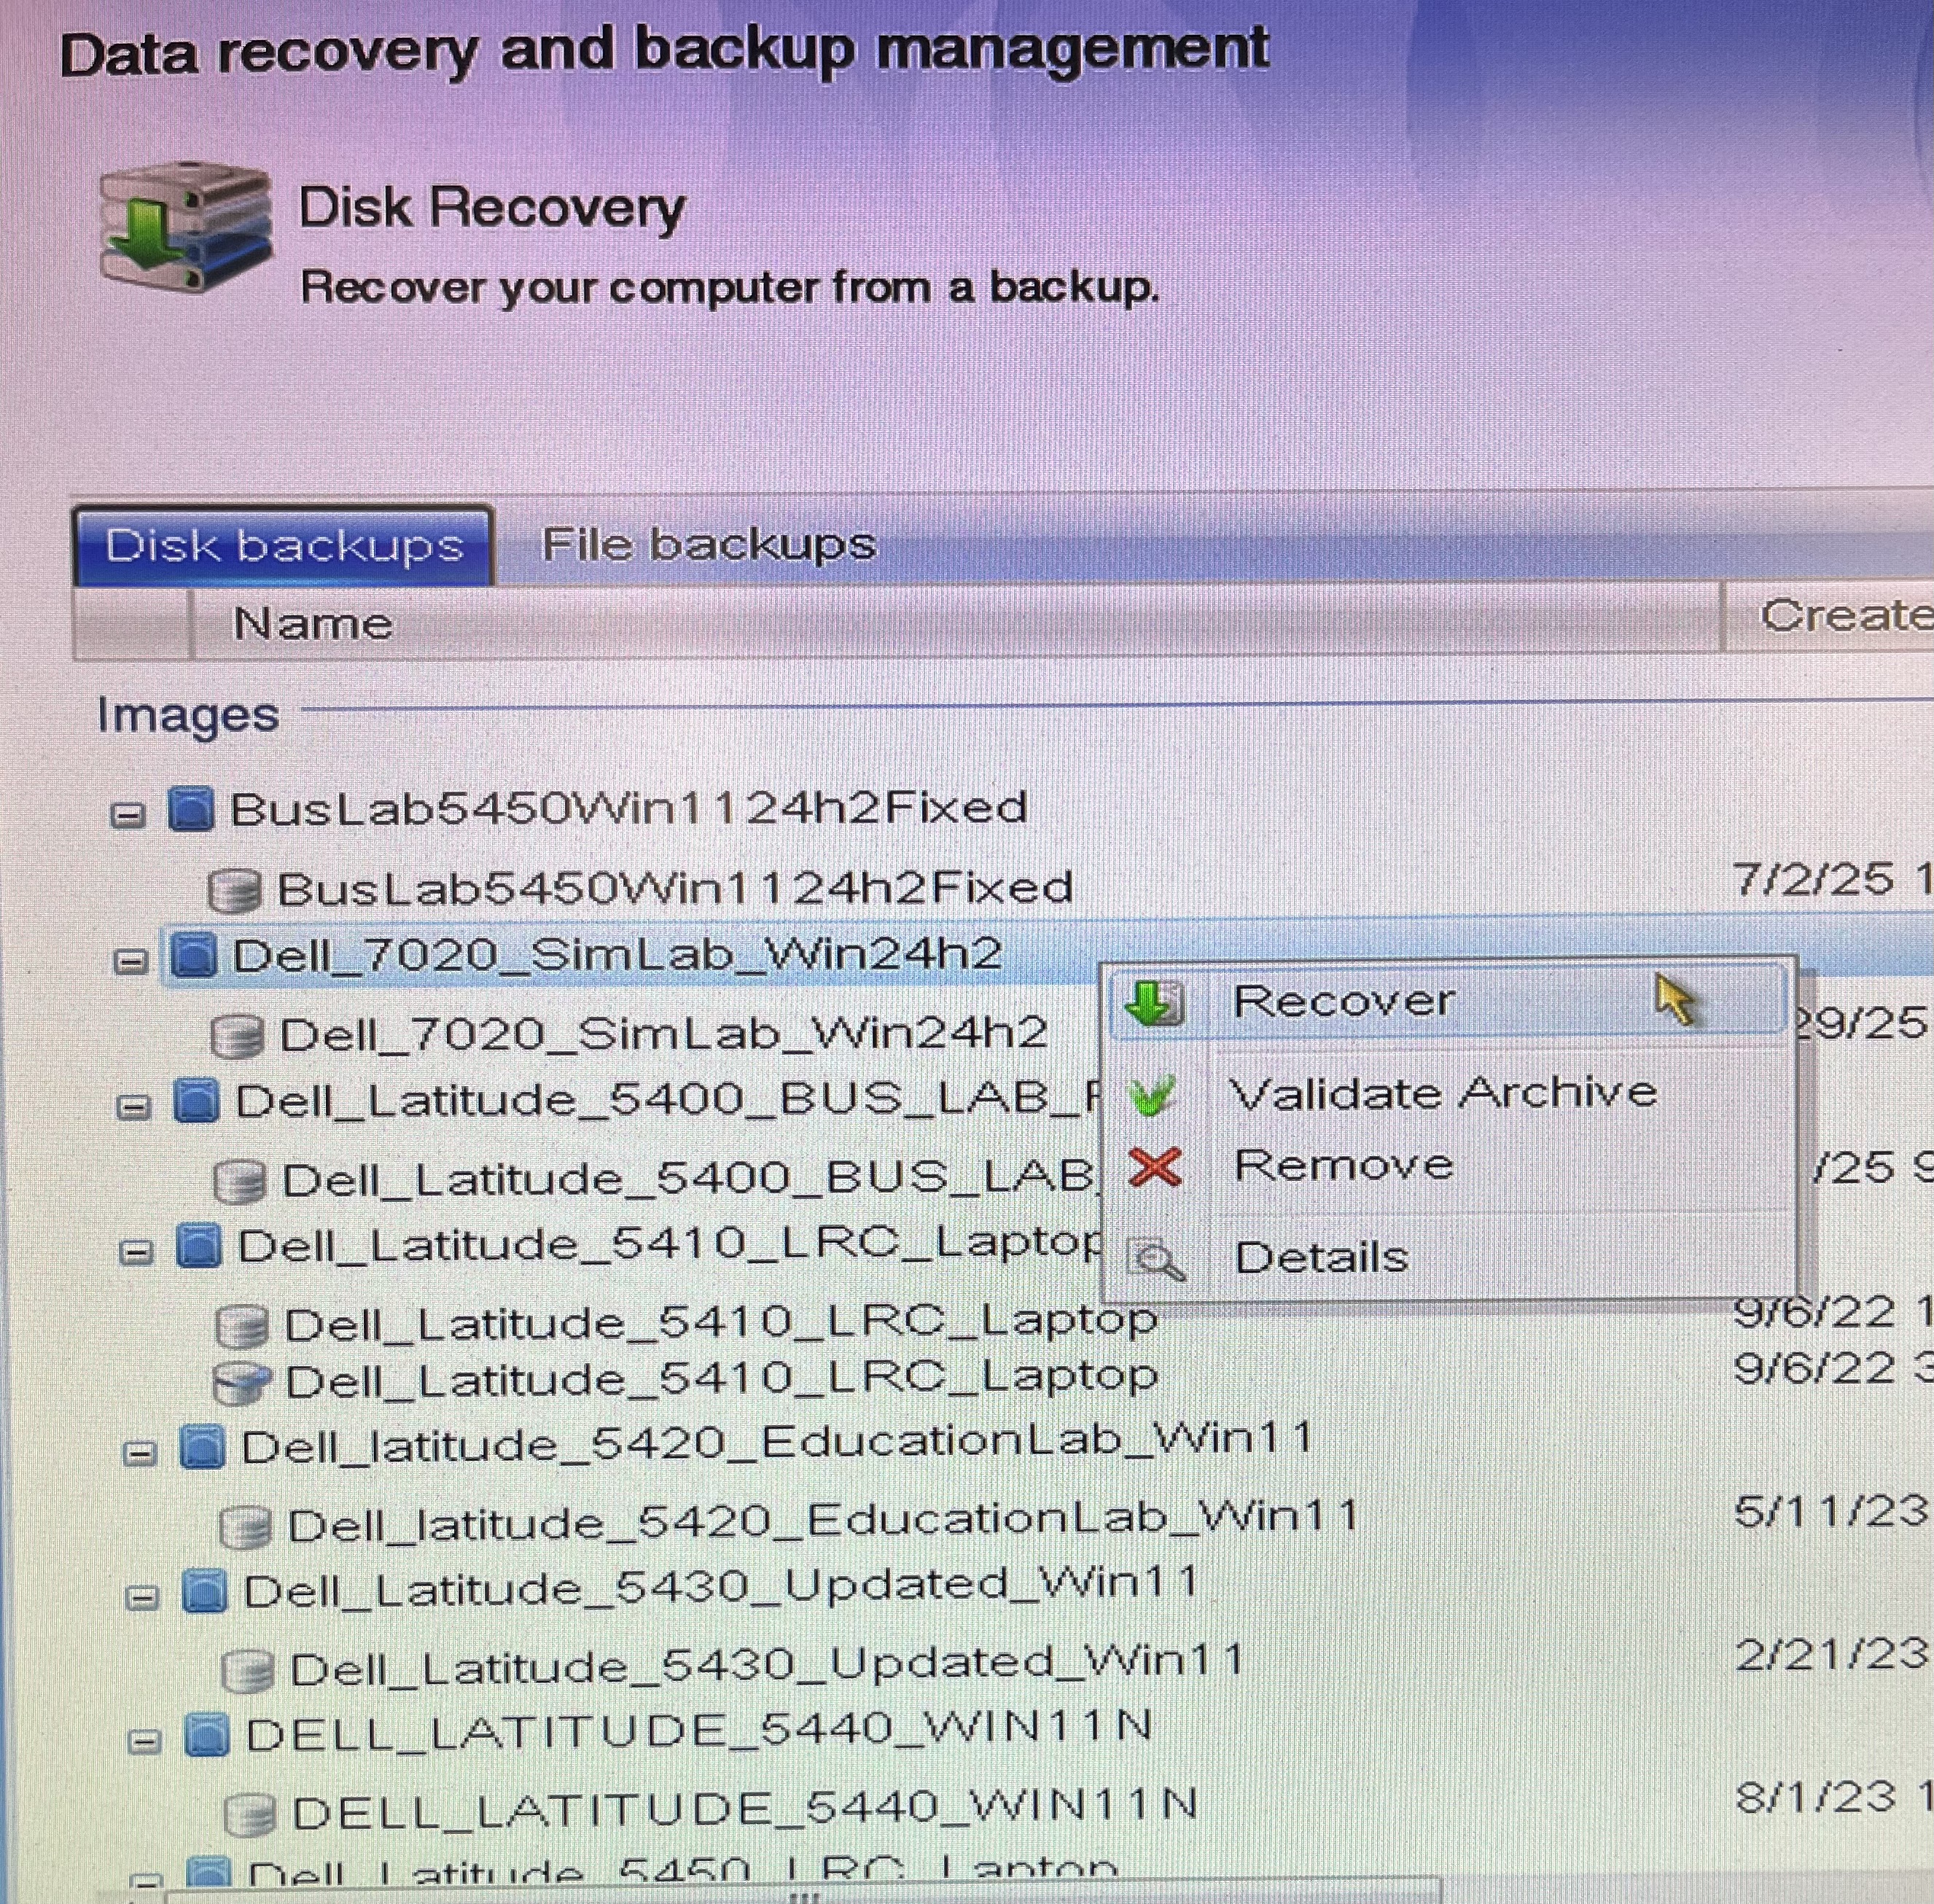
Step 4: choose whichever image is needed for the current situation. Right click and select Recover or left click and then click select at the bottom right.
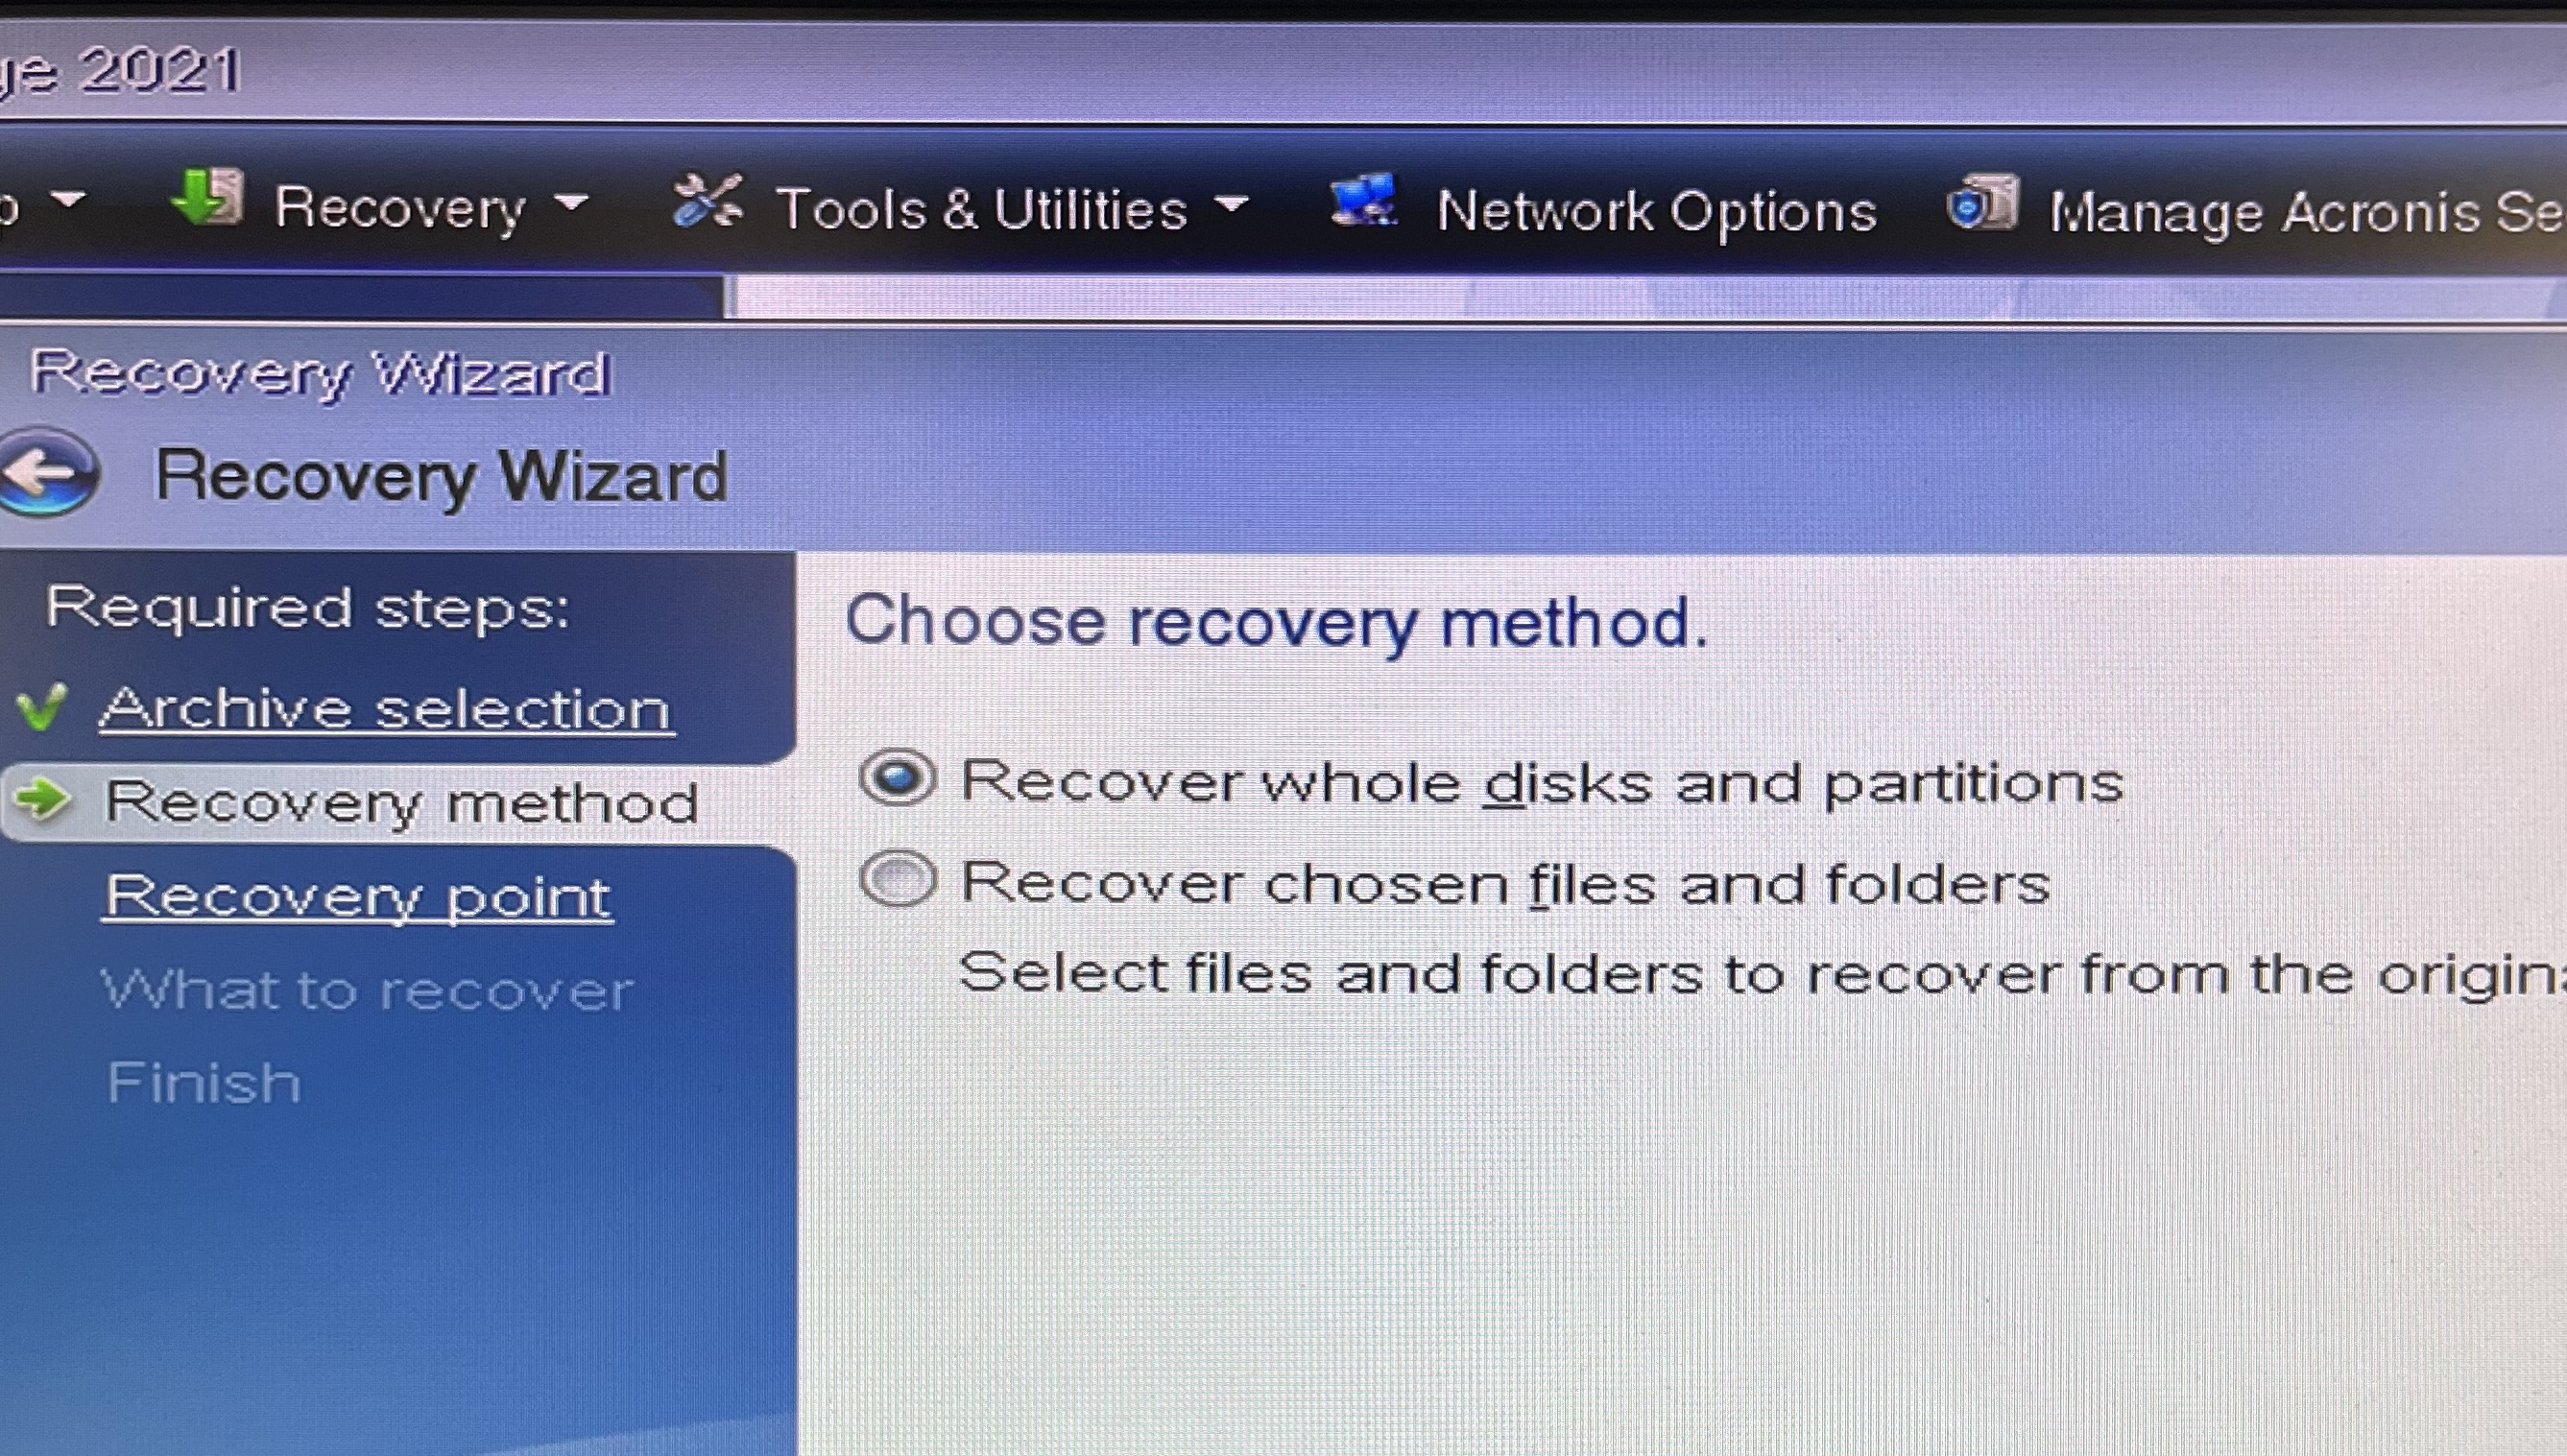
Step 5: choose "Recover whole disks and partitions"
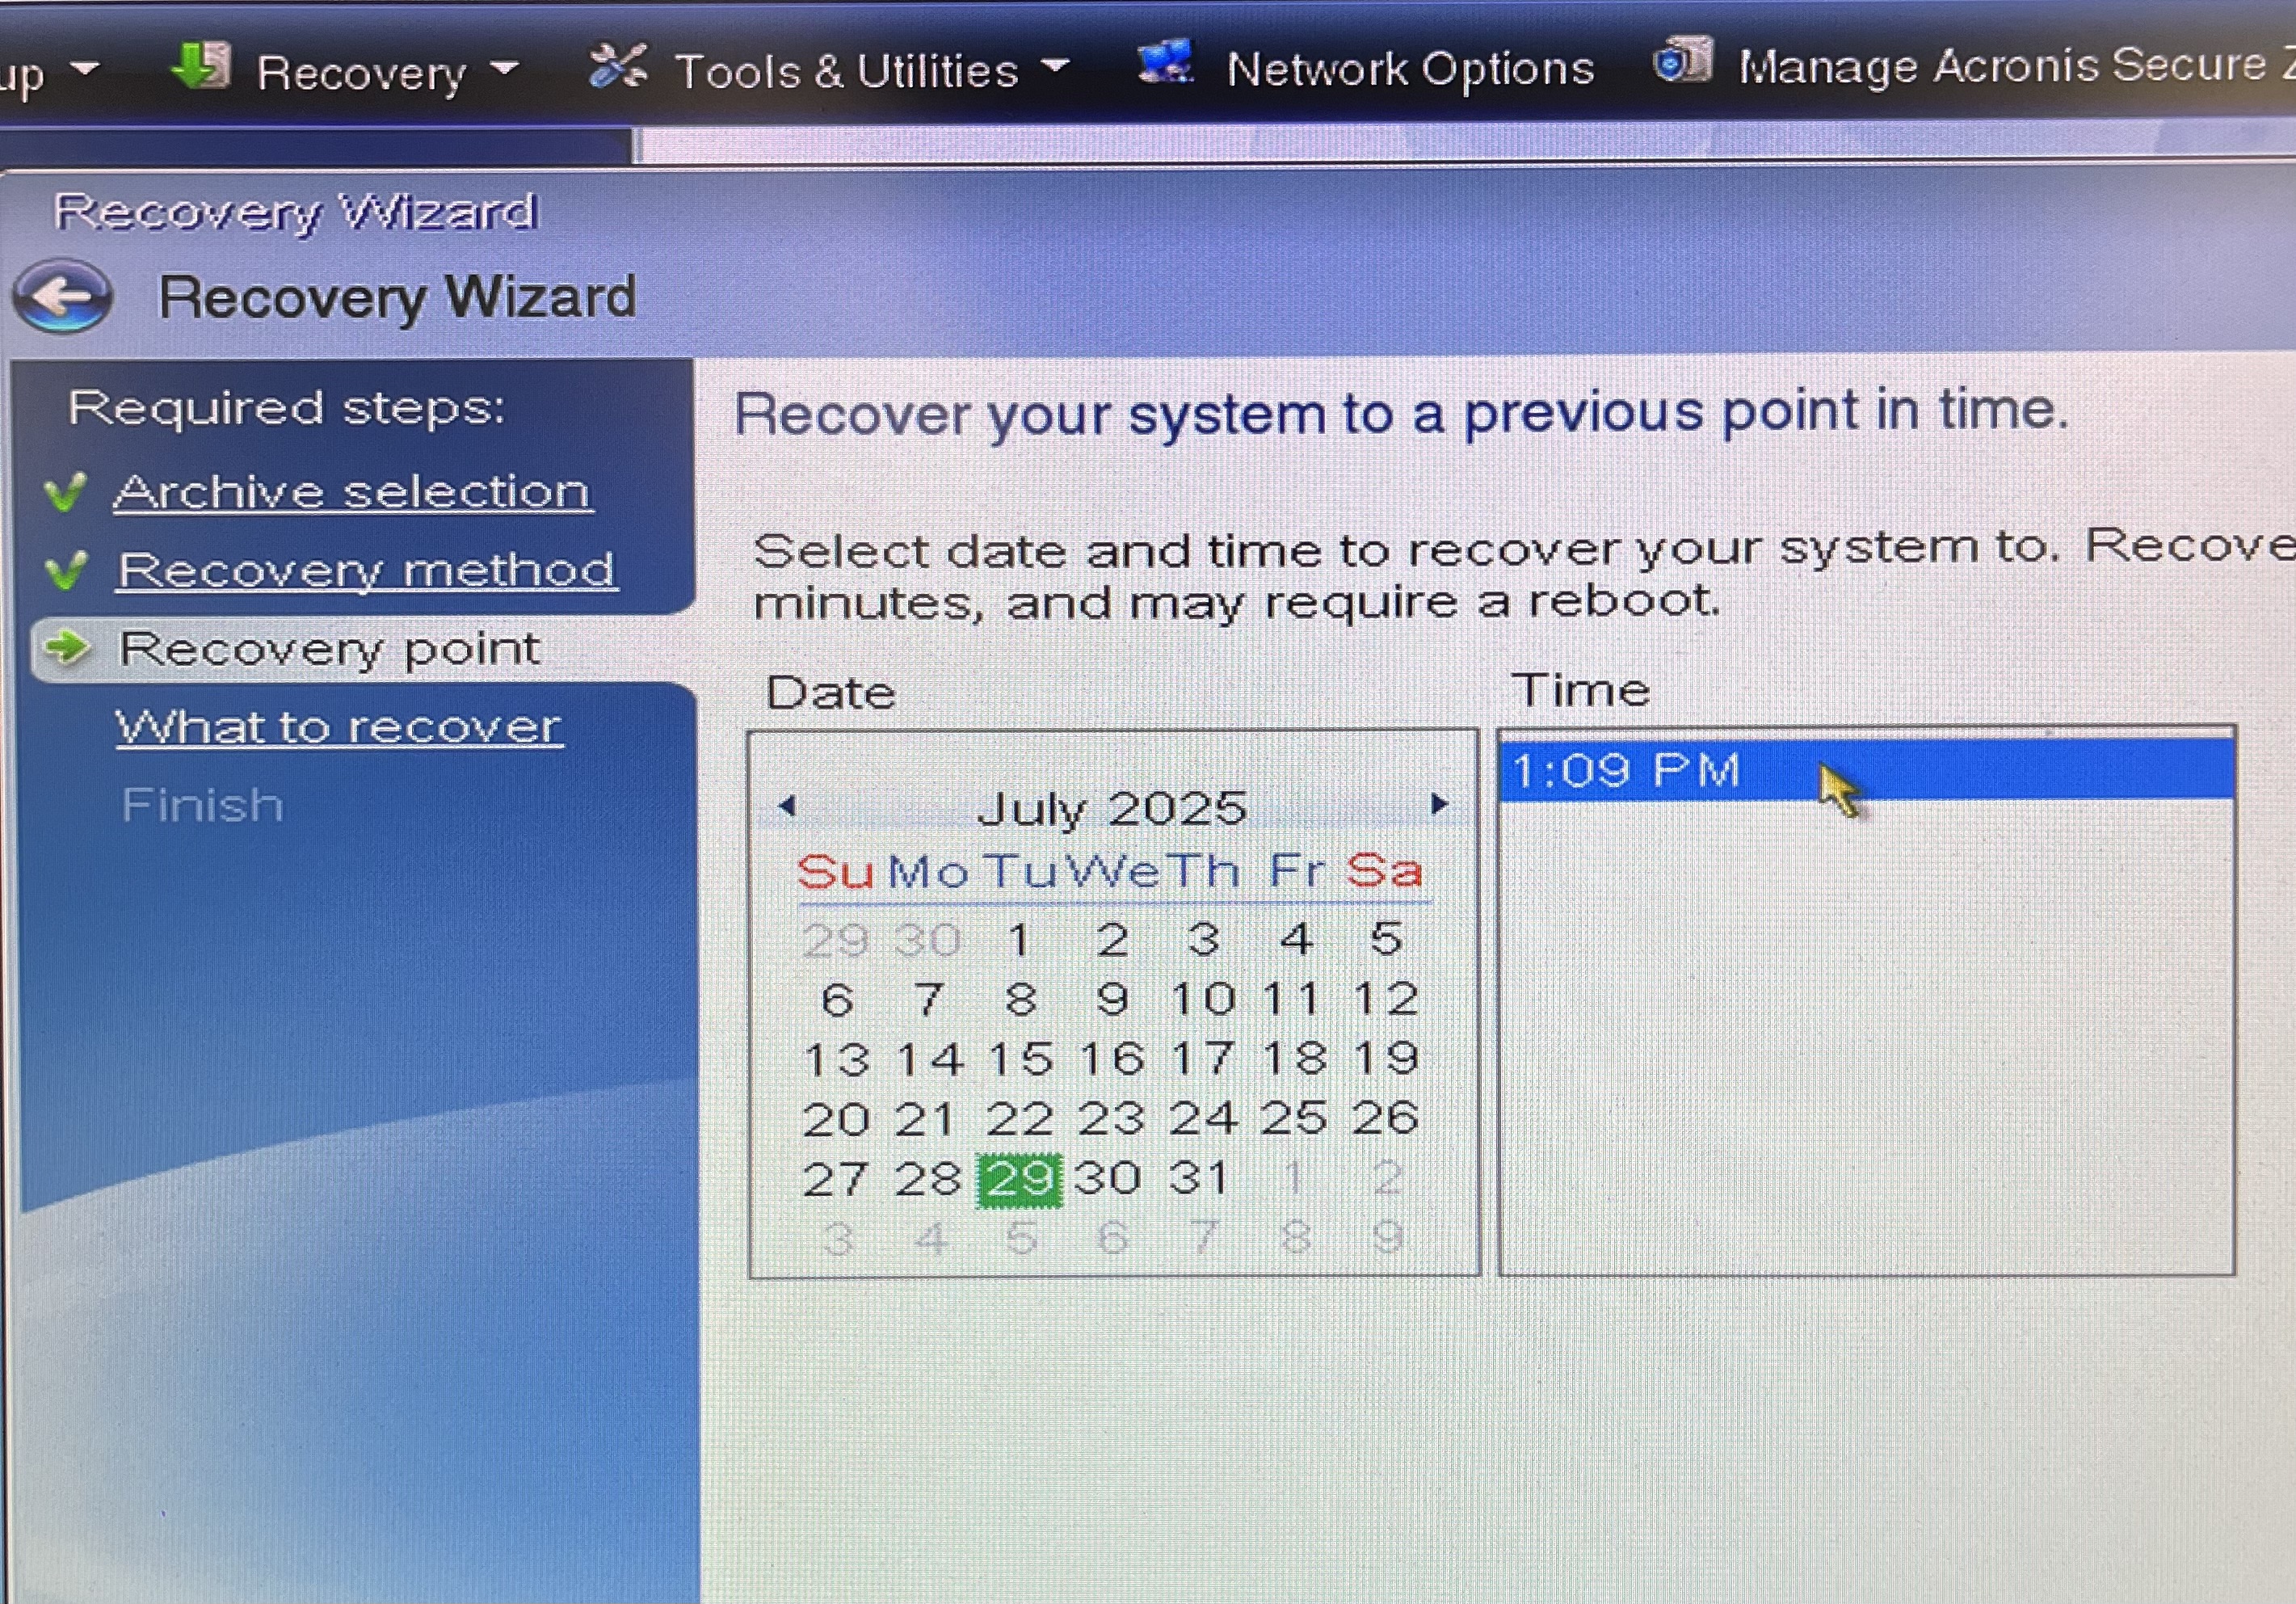
Step 6: use the arrows to look back through the months until a green date comes up. Click the date, choose the time, and then click next.
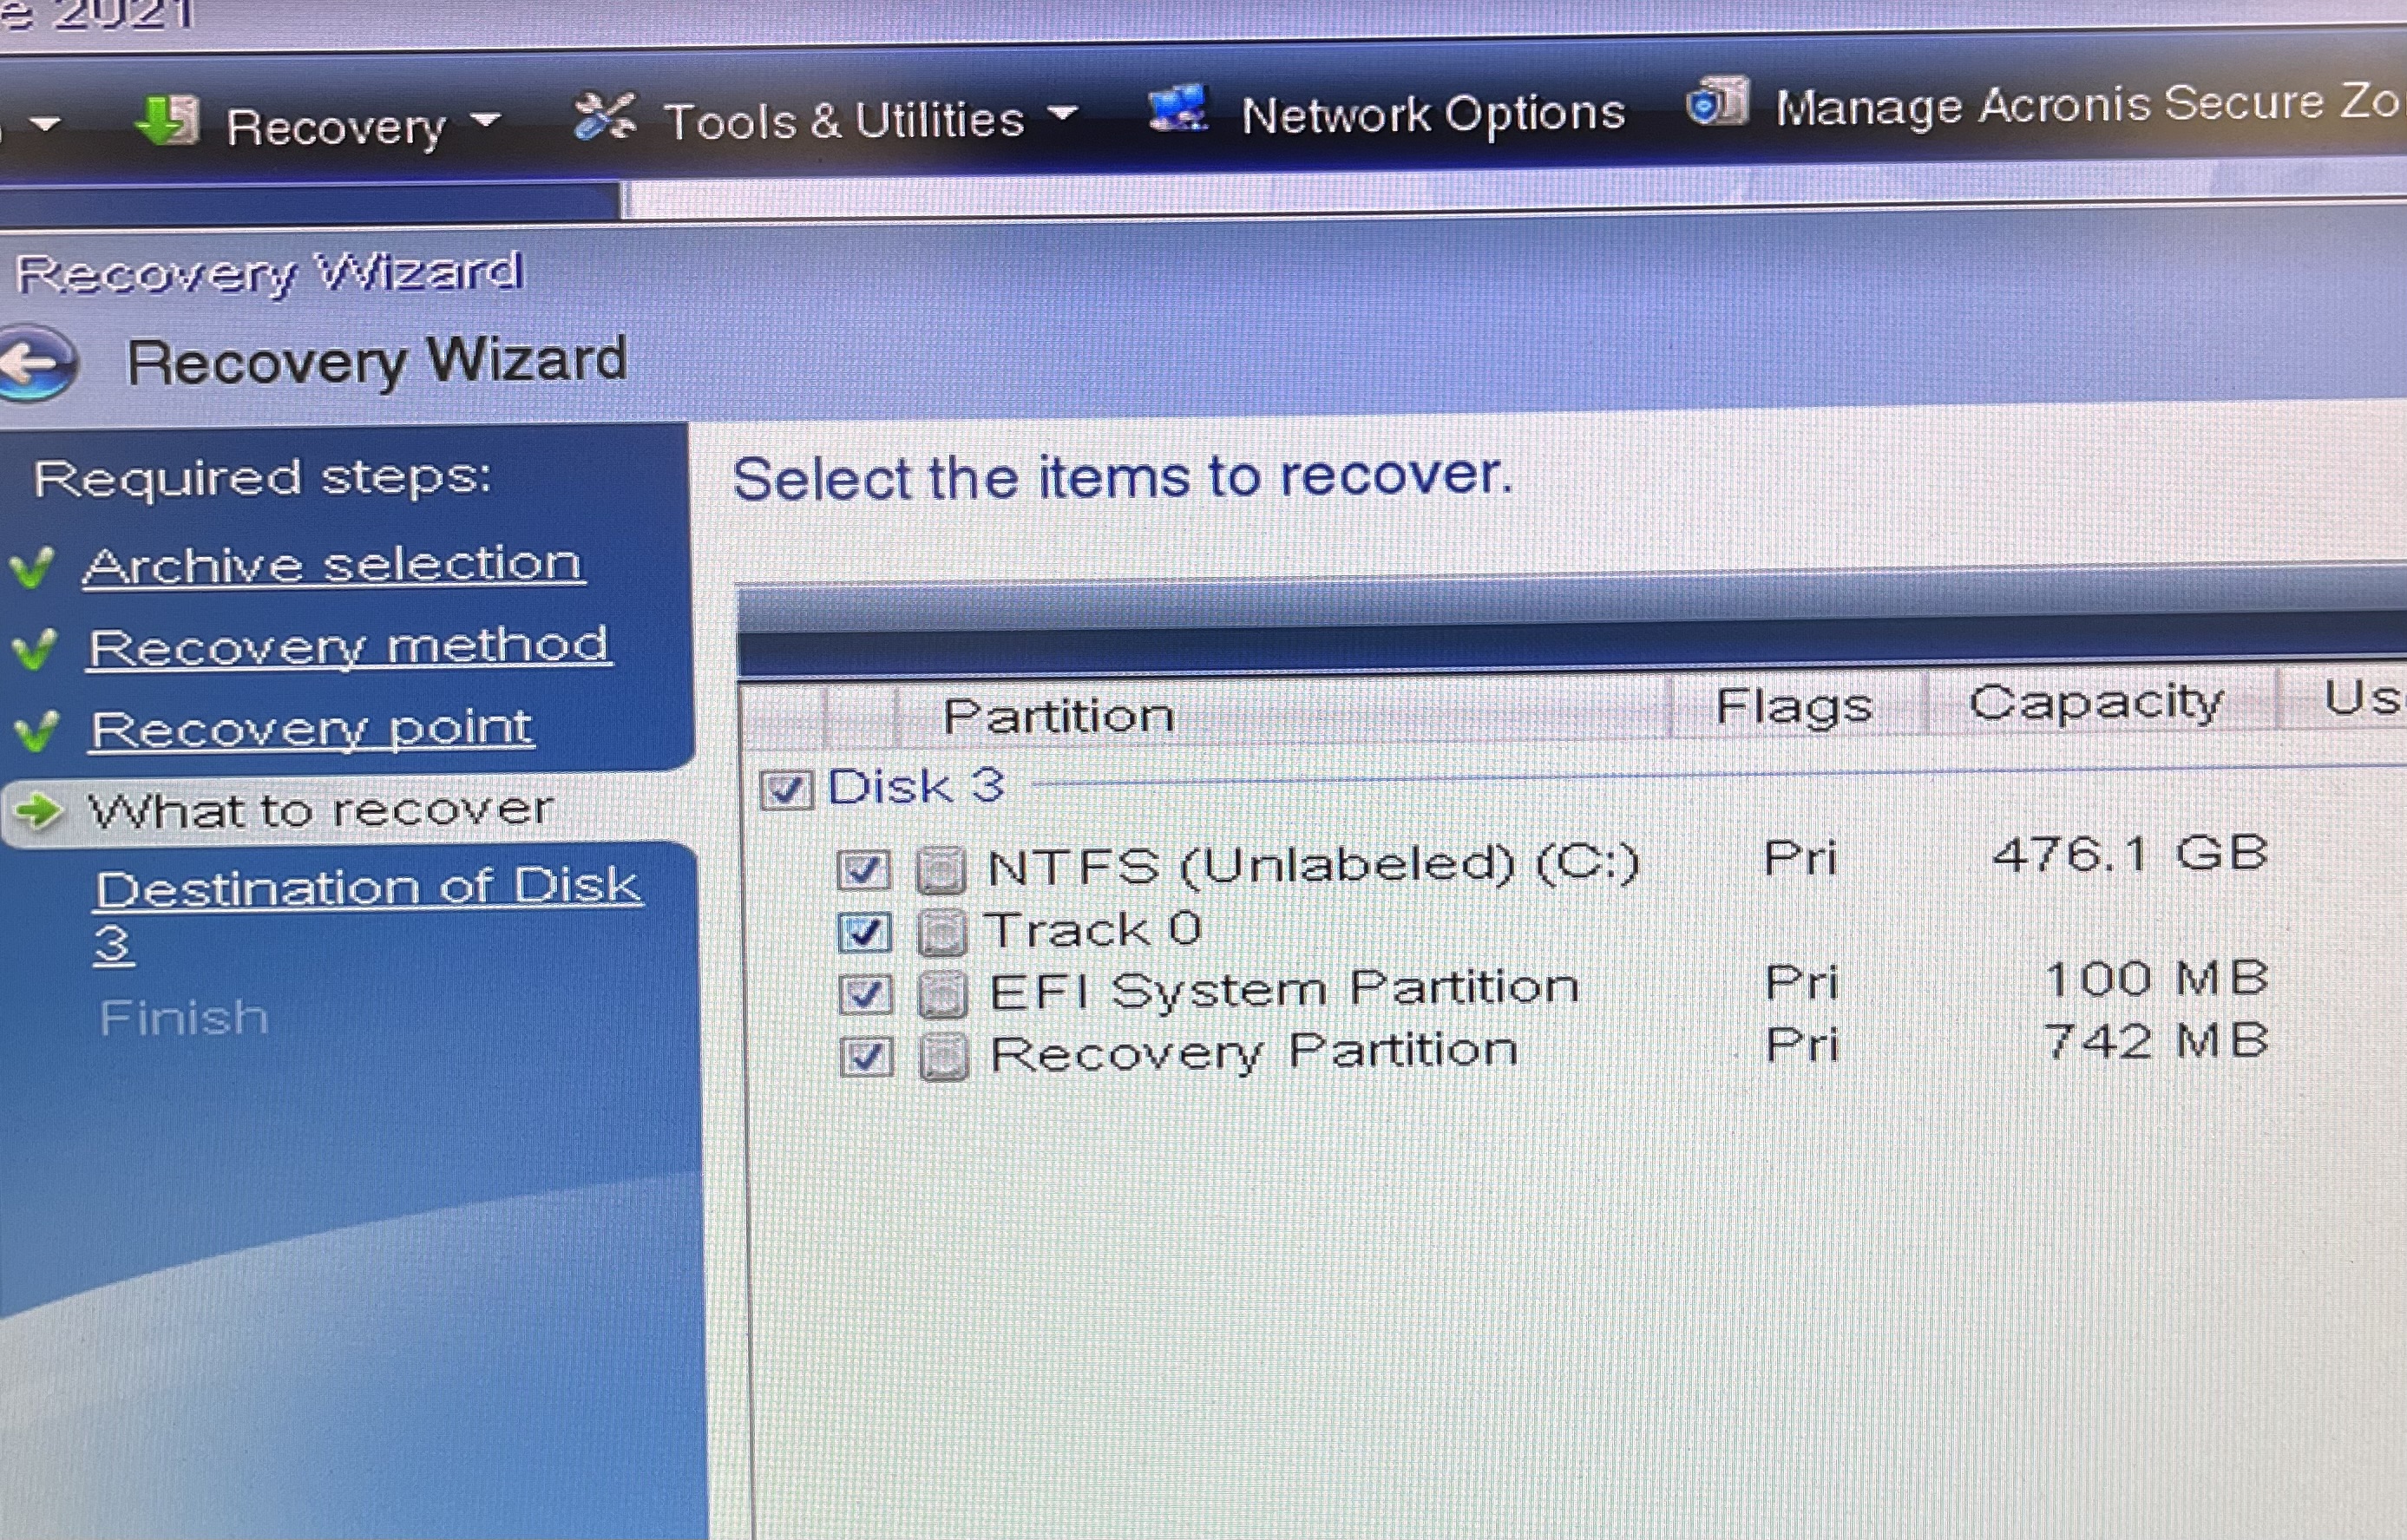
Step 7: Select everything in the disk
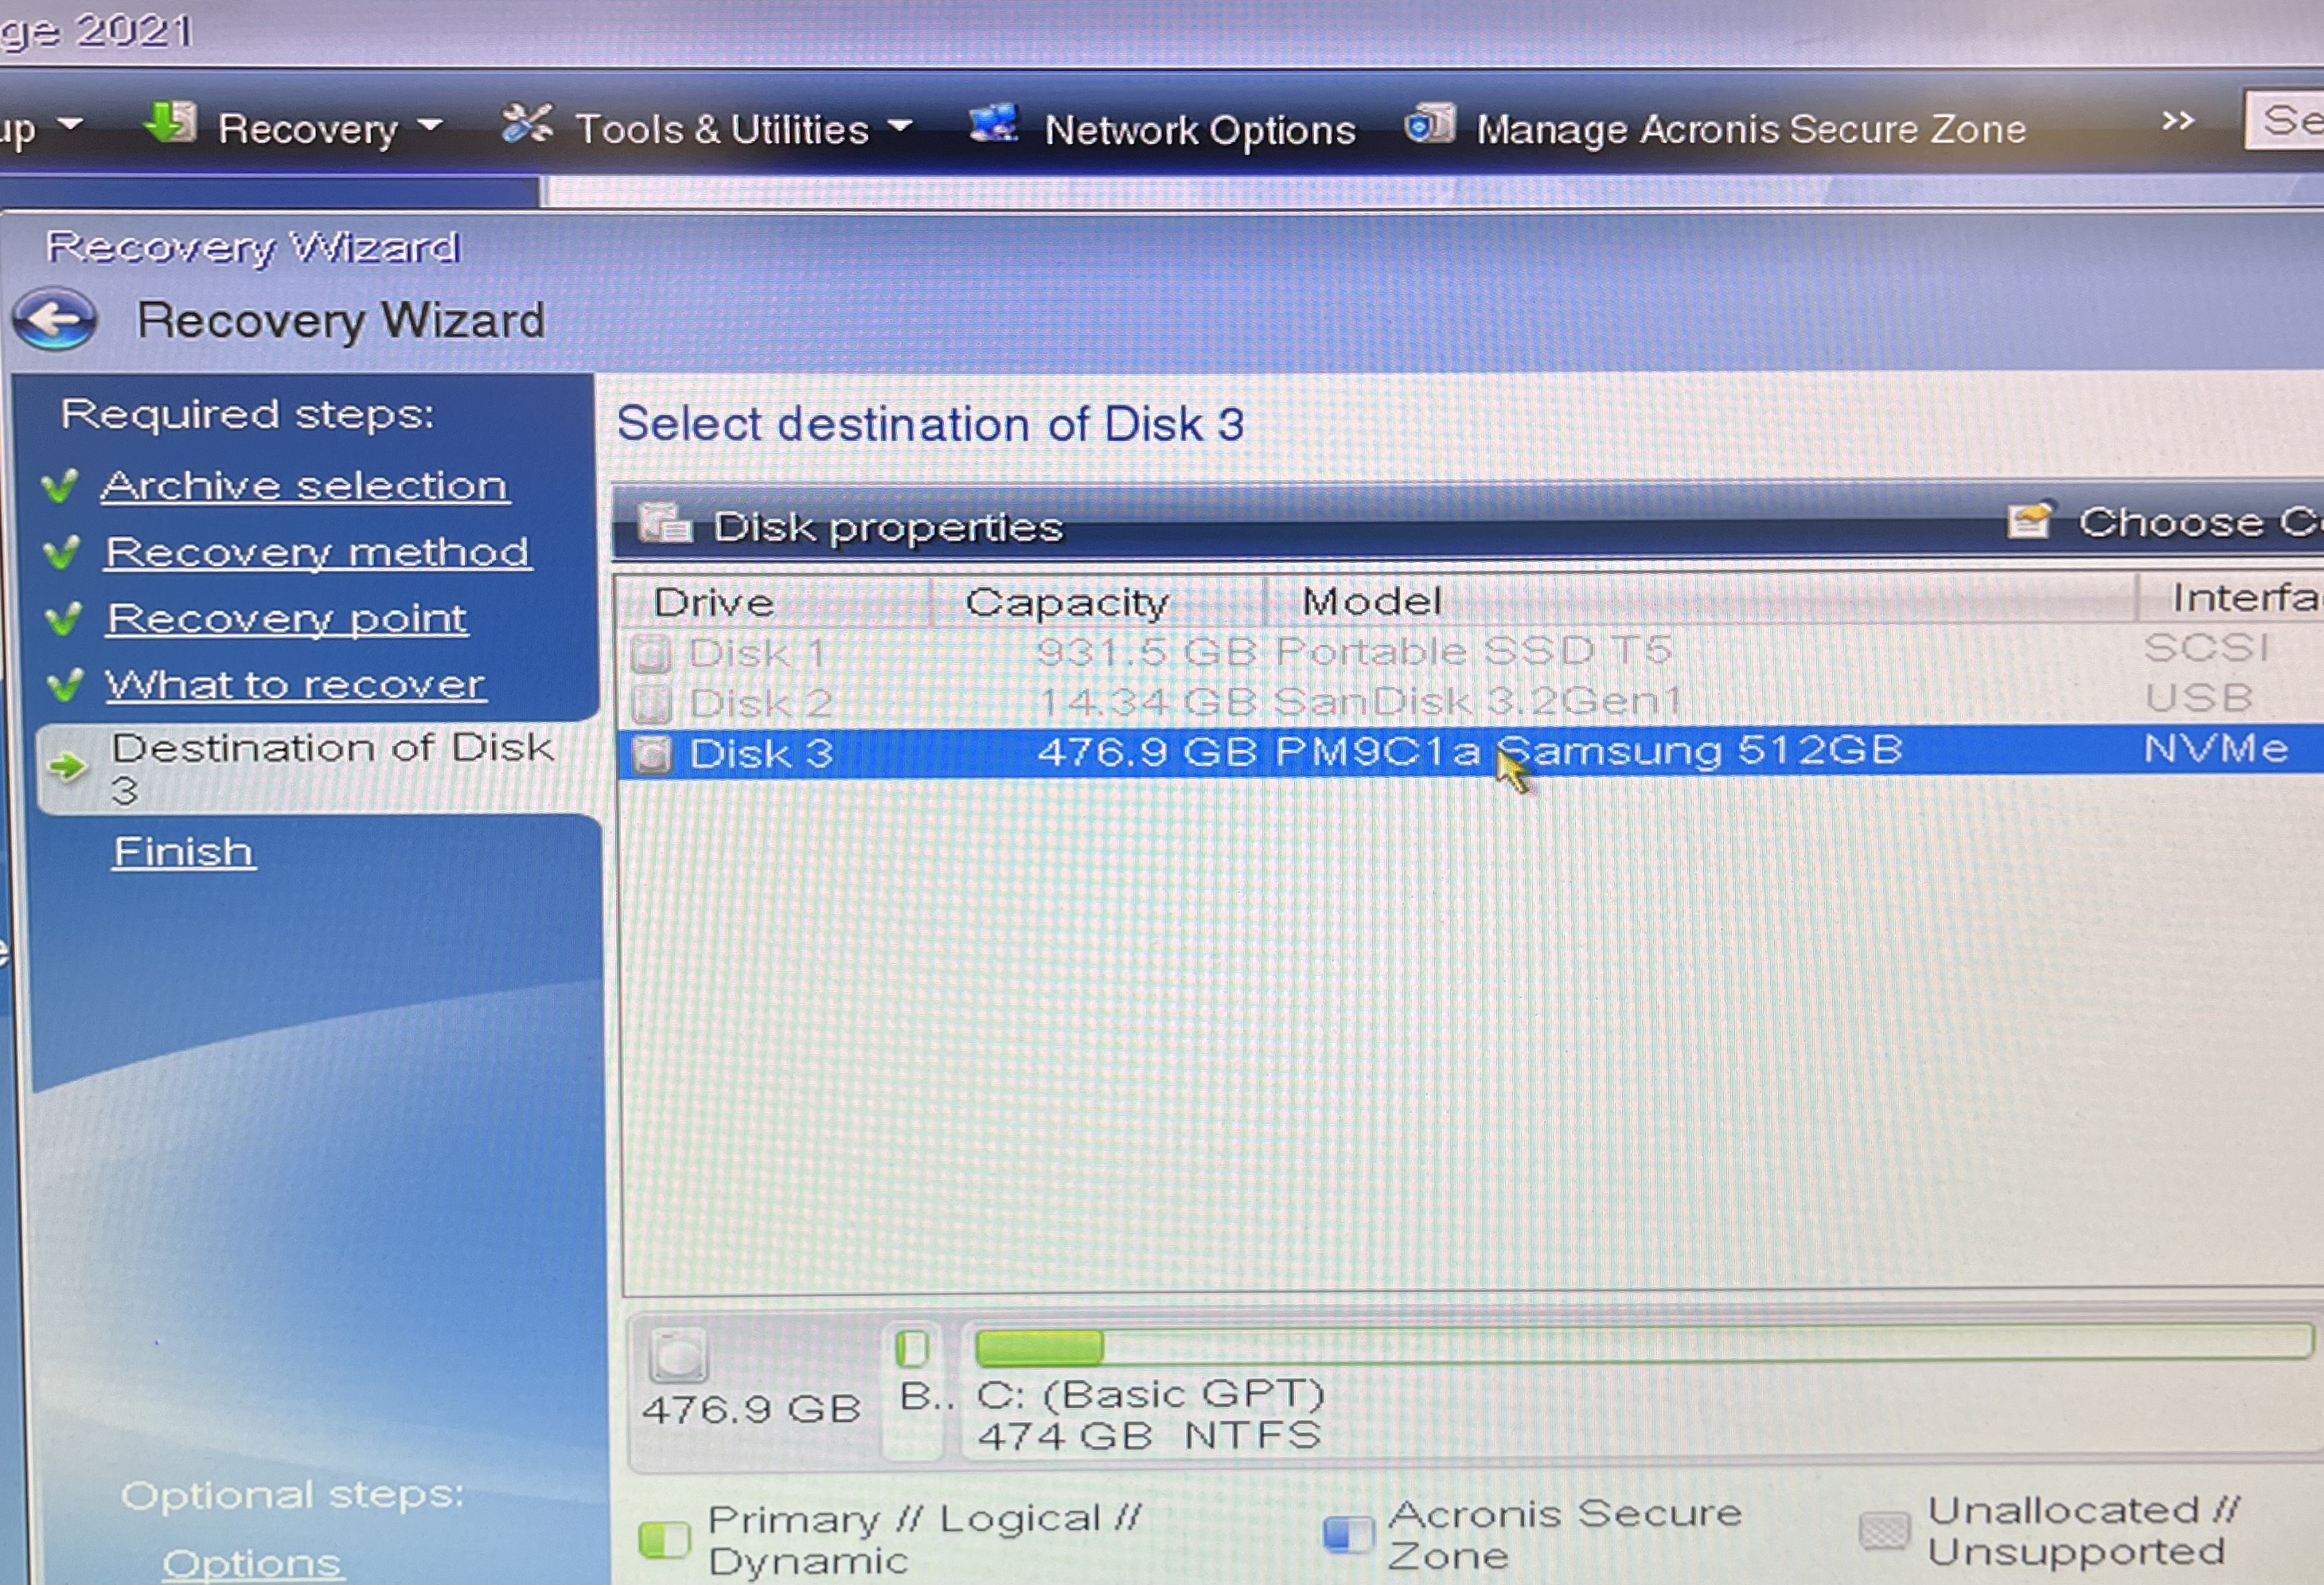
Step 8: choose the NVMe disk (typically the only one available to select or Disk 3)
Step 9: click Proceed and on the next screen and check the box to restart when operation is complete.
Note: if an error occurs here, you will have to wipe the data on the internal drive before being able to continue.
Step 10 (Depends on situation): Login to Administrator with smile password and add computer to domain and register MAC address. Laptops going to docking stations should be registered when plugged into the docking station or else the MAC address will change. Some desktops are not put on the domain, such as Info Displays. So, it depends a bit on the situation.
DataImage16.jpg
DataImage16.jpg
DataImage16.jpg
DataImage16.jpg
DataImage18.jpg
DataImage18.jpg
DataImage2.jpg
DataImage2.jpg
DataImage29.jpg
DataImage29.jpg
DataImage39.jpg
DataImage39.jpg
DataImage48.jpg
DataImage48.jpg
DataImage51.jpg
DataImage51.jpg
DataImage6.jpg
DataImage6.jpg
DataImage7.jpg
DataImage7.jpg
| Files | ||
|---|---|---|
|
DataImage16.jpg 2.6 MB |
||
|
DataImage16.jpg 4 MB |
||
|
DataImage18.jpg 1 MB |
||
|
DataImage2.jpg 848.7 KB |
||
|
DataImage29.jpg 402.3 KB |
||
|
DataImage39.jpg 1.9 MB |
||
|
DataImage48.jpg 2.2 MB |
||
|
DataImage51.jpg 1.5 MB |
||
|
DataImage6.jpg 758.8 KB |
||
|
DataImage7.jpg 1.9 MB |
 Get help for this page
 Jitbit HelpDesk